Nextcloud on RHEL Based Systems
I’m going to show you how to set up your own, self-hosted Nextcloud server using Alma Linux 9 and Apache.
What is Nextcloud?
Nextcloud is so many things. It offers so many features and options, it deserves a bulleted list:
- Free and open source
- Cloud storage and syncing
- Email client
- Custom browser dashboard with widgets
- Office suite
- RSS newsfeed
- Project organization (deck)
- Notebook
- Calender
- Task manager
- Connect to decentralized social media (like Mastodon)
- Replacement for all of google’s services
- Create web forms or surveys
It is also free and open source. This mean the source code is available to all. And hosting yourself means you can guarantee that your data isn’t being shared.
As you can see. Nextcloud is feature packed and offers an all in one solution for many needs. The set up is fairly simple.
You will need:
- Domain hosted through CloudFlare or other hosting.
- Server with Alma Linux 9 with a dedicated public ip address.
Nextcloud dependencies:
- PHP 8.3
- Apache
- sql database (This tutorial uses MariaDB)
Official docs: https://docs.nextcloud.com/server/latest/admin_manual/installation/source_installation.html
Server Specs
Hard drives: 120g main 500g data 250g backup
OS: Alma 9 CPU: 4 sockets 8 cores RAM: 32768
ip 10.0.10.56/24 root: { password } davidt: { password }
Storage setup
Setting up dependencies
Install latest supported PHP
I used this guide to help get a supported php version. As php 2 installed from dnf repos by default: https://orcacore.com/php83-installation-almalinux9-rockylinux9/
Make sure dnf is up to date:
Set up the epel repository:
Set up remi to manage php modules:
Remove old versions of php:
List available php streams:
Enable the correct stream:
Now the default to install is version 8.3, install it like this:
Let’s install git, as it’s also needed in this setup:
sudo dnf -y install git
Install Composer for managing php modules:
Install needed PHP modules:
sudo dnf -y install php-process php-zip php-gd php-mysqlnd php-ldap php-imagick php-bcmath php-gmp php-intl
Upgrade php memory limit:
sudo vim /etc/php.ini
Apache setup
Add Apache config for vhost:
sudo vim /etc/httpd/conf.d/nextcloud.conf
Set up the mysql database
Install:
sudo dnf install mariadb-server -y
Enable the service:
sudo systemctl enable --now mariadb
Nextcloud needs some tables setup in order to store information in a database. First set up a secure sql database:
Say “Yes” to the prompts and enter root password:
Sign in to your SQL database with the password you just chose:
Create the database:
While signed in with the mysql command, enter the commands below one at a time. Make sure to replace the username and password. But leave localhost as is:
Nextcloud Install
Download nextcloud onto the server.
Extract the contents to /var/www/nextcloud
tar -xjf nextcloud-31.0.4.tar.bz2 -C /var/www/ --strip-components=1
Change the nextcloud folder ownership to apache and add permissions:
sudo chmod -R 755 /var/www/nextcloud
sudo chown -R apache:apache /var/www/nextcloud
Selinux:
Now we can actually install Nextcloud. cd to the /var/www/nextcloud directory and run occ with these settings to install:
Create a CNAME record for DNS.
Before you go any further, you will need to have a domain name set up for your server. I use Cloudflare to manage my DNS records. You will want to make a CNAME record for your nextcloud subdomain.
Just add “nextcloud” as the name and “yourwebsite.com” as the content. This will make it so “nextcloud.yourwebsite.com” is the site for your nextcloud dashboard. Also, make sure to select “DNS Only” under proxy status.
Here’s what my CloudFlare domain setup looks with this blog as the main site, and cloud.perfectdarkmode.com as the nextcloud site:

Then you need to update trusted domains in /var/www/nextcloud/config/config.php:
Install Apache
Install:
sudo dnf -y install httpd
Enable:
systemctl enable --now httpd
Restart httpd
systemctl restart httpd
Firewall rules:
Install SSL with Certbot
Install certbot:
sudo dnf install certbot python3-certbot-apache -y
Obtain an SSL certificate. (See my Obsidian site setup post for information about Certbot and Apache setup.)
Now log into nextcloud with your admin account using the DNS name you set earlier:

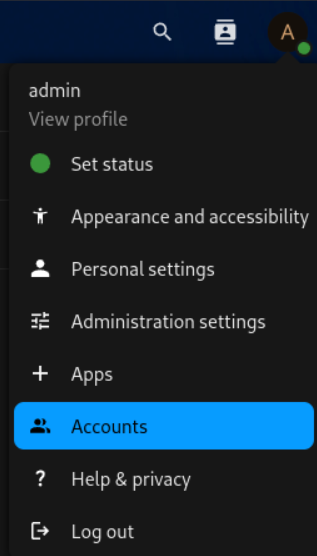
I recommend setting up a normal user account instead of doing everything as “admin”. Just hit the “A” icon at the top right and go to “Accounts”. Then just select “New Account” and create a user account with whatever privileges you want.
I may make a post about which Nextcloud apps I recommend and customize the setup a bit. Let me know if that’s something you’d like to see. That’s all for now.
Make log dir:
Change apps to read only
Allow outbound network:
Backup
mkdir /home/databkup
chown -R apache:apache /home/databkup
vim /root/cleanbackups.sh
chmod +x /root/cleanbackups.sh
crontab -e
mkdir /home/backup
Update Mariadb:
Mimetype migration error:
sudo -u apache /var/www/nextcloud/occ maintenance:repair --include-expensive
Indices error:
sudo -u apache /var/www/nextcloud/occ db:add-missing-indices
Redis install for memcache
This setup uses Redis for File locking and APCu for memcache
dnf -y install redis php-pecl-redis php-pecl-apcu
systemctl enable --now redis
Add to config.php:
Update /etc/redis/redis.conf
vim /etc/redis/redis.conf
change port to port 0/
uncomment the socket options under “Unix Socket” and change to:
Update permissions for redis
usermod -a -G redis apache
Uncomment the line in /etc/php.d/40-apcu.ini and change from 32M to 256M
vim /etc/php.d/40-apcu.ini
apc.shm_size=256M
Restart apache and redis:
Added logging and phone region to config.php:
mkdir /var/log/nextcloud/
OP-Cache error
Change opcache.interned_strings_buffer to 16 and uncomment:
vim /etc/php.d/10-opcache.ini
systemctl restart php-fpm httpd
Last job execution ran 2 months ago. Something seems wrong.
Set up cron job for the Apache user:
crontab -u apache -e
Add to file that shows up:
Other Errors
- The “files_reminders” app needs the notification app to work properly. You should either enable notifications or disable files_reminder.
Disabled files_reminder app
- Server has no maintenance window start time configured. This means resource intensive daily background jobs will also be executed during your main usage time. We recommend to set it to a time of low usage, so users are less impacted by the load caused from these heavy tasks. For more details see the documentation ↗.
Added 'maintenance_window_start' => 1, to config.php
- Some headers are not set correctly on your instance - The
Strict-Transport-SecurityHTTP header is not set (should be at least15552000seconds). For enhanced security, it is recommended to enable HSTS. For more details see the documentation ↗.
Added after closing directory line in SSL config:
And add to the bottom of /var/www/nextcloud/.htaccess:
"Header always set Strict-Transport-Security "max-age=15552000; includeSubDomains"
Change this line in config.php from localhost to server name:
- Integrity checker has been disabled. Integrity cannot be verified.
Ignore this
Your webserver does not serve .mjs files using the JavaScript MIME type. This will break some apps by preventing browsers from executing the JavaScript files. You should configure your webserver to serve .mjs files with either the text/javascript or application/javascript MIME type.
sudo vim /etc/httpd/conf.d/nextcloud.conf- ad
AddType text/javascript .mjsinside the virtual host block. Restart apache.
Your web server is not properly set up to resolve “/ocm-provider/”. This is most likely related to a web server configuration that was not updated to deliver this folder directly. Please compare your configuration against the shipped rewrite rules in “.htaccess” for Apache
add to vim /var/www/nextcloud/.htaccess
Your web server is not properly set up to resolve .well-known URLs, failed on: /.well-known/caldav
added to vim /var/www/nextcloud/.htaccess
PHP configuration option “output_buffering” must be disabled
vim /etc/php.ini
output_buffering = Off
Installed tmux
dnf -y install tmux
Apps
Disabled File Reminders app
Add fail2ban
sudo dnf -y install fail2ban
vim /etc/fail2ban/jail.local
systemctl enable –now fail2ban fail2ban-client status sshd